User Seats
note
This page covers the process for manually adding users to organizations. Other methods, however, are available for automatic user and group provisioning:
Teams and Enterprise organizations can use SCIM.
Teams and Enterprise organizations can use Directory Sync.
Enterprise organizations can use JIT.
The Bitwarden web app can be used to add members to your organization. To ensure the security of your organization and secure sharing of data, adding new members is 3-step process designed to maintain end-to-end encryption:
Invite: Admins issue emails to users, inviting them to join the organization.
Accept: Users interact with email invitations in order to begin joining the organization.
Confirm: Admins confirm that the accepted users are authorized to join the organization.
tip
For Enterprise organizations, Bitwarden recommends configuring enterprise policies prior to inviting members to ensure compliance on entrance to your organization.
To invite users to your organization:
Log in to the Bitwarden web app and open the Admin Console.
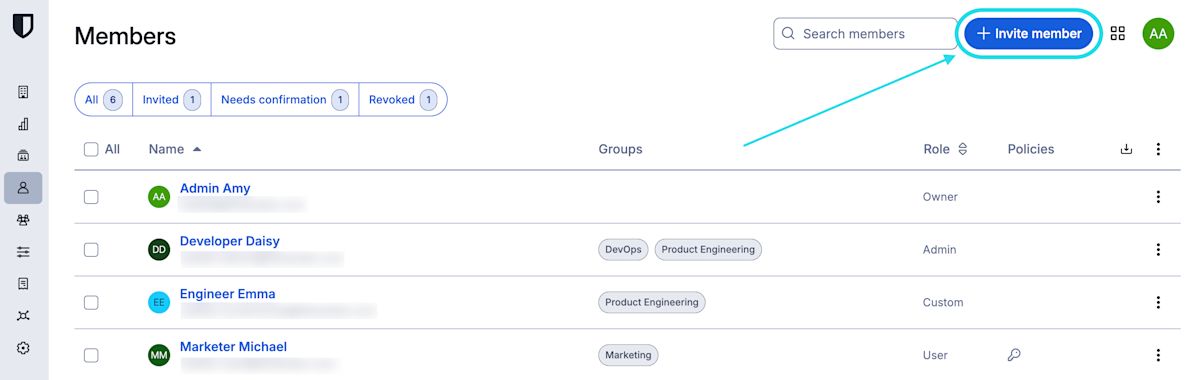
Navigate to the Members view and select the Invite member button:
Invite member to an organization On the Invite member panel:
Enter the Email addresses where new members should receive invites. Add multiple members at one time by comma-separating email addresses.
Select the Member role to be applied to the new members. Member role will determine what permissions they will have at an organizational level.
In the Groups tab, select which groups to add these users to.
In the Collections tab, select collections to give these users access and what permissions they should have for each collection.
note
While member roles are set at an individual-member level, permissions can be set for an individual member or an entire group. Permissions assigned at the member level will override permissions set at a group level.
Click Save to invite the designated members to your organization.

note
Invitations expire after five days, at which point the member will need to be re-invited. Re-invite members in bulk by selecting each member and using the Options icons to select Resend invitations:

If you're self-hosting Bitwarden, you can configure the invitation expiration period using an environment variable.
Invited members will receive an email from Bitwarden inviting them to join the organization. Clicking the link in the email will open the Bitwarden web app, where the user can log in or create an account to accept the invitation:

Users must fully log in to the Bitwarden web app to accept the invitation. When an invitation is accepted, users will be notified that they can access the organization once confirmed. Organization members will have their email automatically verified when they accept an invitation.
To confirm that the accepted users are authorized to join the organization:
In the Admin Console, navigate to the Members view.
Select any members marked
Needs confirmationand use the options menu to Confirm selected: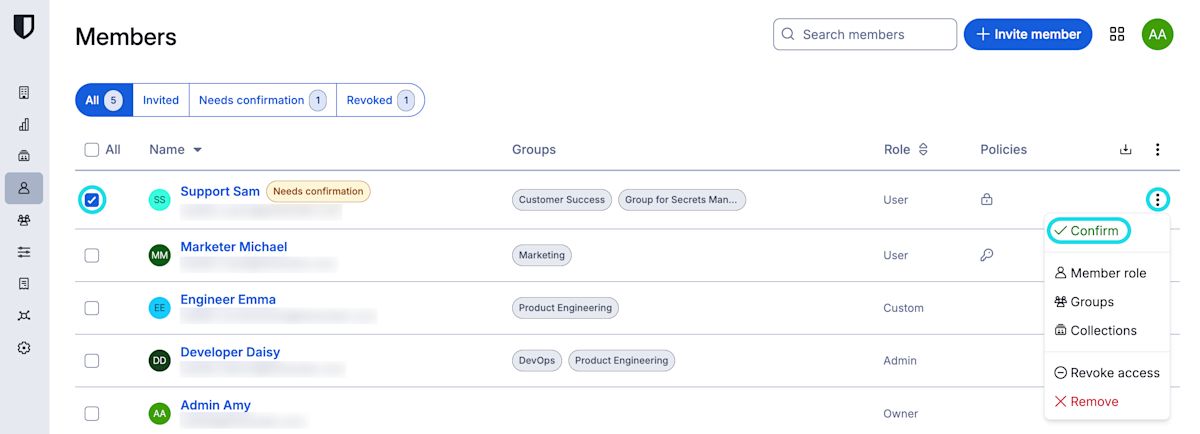
Confirm member to an organization Using a secure means of communication, validate with each new member that the fingerprint phrase displayed to you at this stage matches what they can find in their in Settings → My account view. Each fingerprint phrase is unique to an account, and ensures a final layer of oversight in securely adding users. If they match, select Submit.

Fingerprint phrase


note
If Never prompt to verify fingerprint phrases has been toggled on, fingerprint phrase verification be reactivated by clearing the browser cache and cookies.