User Seats
note
Ce document couvre le flux d'intégration manuel pour ajouter des utilisateurs aux organisations Bitwarden, cependant Bitwarden propose deux méthodes pour la provision automatique des utilisateurs et des groupes :
Les organisations d'Entreprise peuvent utiliser les intégrations SCIM pour Azure AD, Okta, OneLogin, et JumpCloud.
Les organisations d'Équipes et d'Entreprise peuvent utiliser Directory Connector pour Active Directory/LDAP, Azure AD, Google Workspace, Okta, et OneLogin.
The Bitwarden web app can be used to add members to your organization. To ensure the security of your organization and secure sharing of data, adding new members is 3-step process designed to maintain end-to-end encryption:
Invite: Admins issue emails to users, inviting them to join the organization.
Accept: Users interact with email invitations in order to begin joining the organization.
Confirm: Admins confirm that the accepted users are authorized to join the organization.
tip
Pour les organisations de l'Entreprise, nous recommandons de configurer les politiques de sécurité de l'entreprise avant d'inviter les utilisateurs pour garantir la conformité dès l'entrée dans votre organisation.
To invite users to your organization:
Log in to the Bitwarden web app and open the Admin Console.
Navigate to the Members view and select the Invite member button:
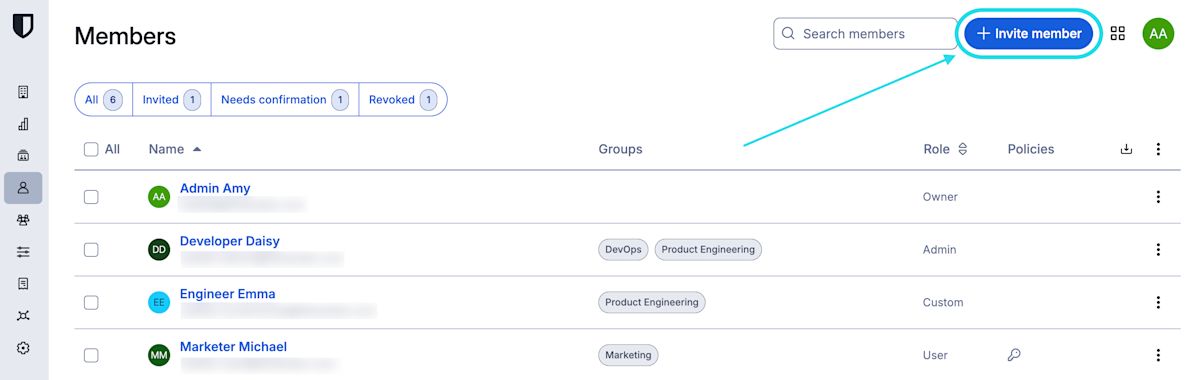
Inviter un membre à une organisation gratuite On the Invite member panel:
Enter the Email addresses where new members should receive invites. Add multiple members at one time by comma-separating email addresses.
Select the Member role to be applied to the new members. Member role will determine what permissions they will have at an organizational level.
In the Groups tab, select which groups to add these users to.
In the Collections tab, select collections to give these users access and what permissions they should have for each collection.
note
Bien que le rôle de membre ne puisse être défini qu’au niveau d’un membre individuel, les autorisations peuvent être définies pour un membre individuel ou pour un groupe dans son ensemble. Les autorisations définies au niveau d’un membre remplaceront les autorisations définies au niveau du groupe.
Click Save to invite the designated members to your organization.

note
Les invitations expirent après 5 jours, après quoi l'utilisateur devra être à nouveau invité. Réinvitez les utilisateurs en masse en sélectionnant chaque utilisateur et en utilisant les options du menu pour Renvoyer les invitations:

Si vous auto-hébergez Bitwarden, vous pouvez configurer la période d'expiration de l'invitation en utilisant une variable d'environnement.
Invited members will receive an email from Bitwarden inviting them to join the organization. Clicking the link in the email will open the Bitwarden web app, where the user can log in or create an account to accept the invitation:

Users must fully log in to the Bitwarden web app to accept the invitation. When an invitation is accepted, users will be notified that they can access the organization once confirmed. Organization members will have their email automatically verified when they accept an invitation.
To confirm that the accepted users are authorized to join the organization:
In the Admin Console, navigate to the Members view.
Select any members marked
Needs confirmationand use the options menu to Confirm selected: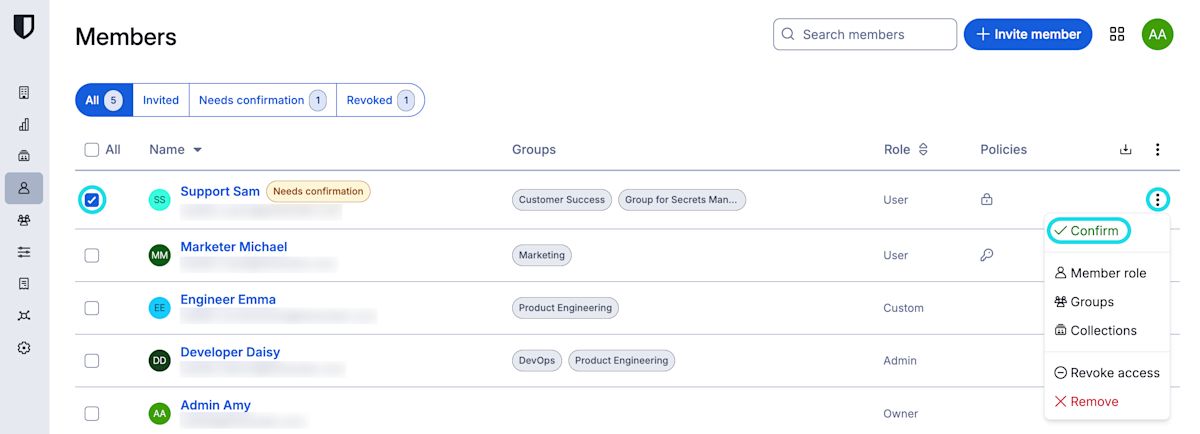
Confirmer le membre à l'organisation gratuite Using a secure means of communication, validate with each new member that the fingerprint phrase displayed to you at this stage matches what they can find in their in Settings → My account view. Each fingerprint phrase is unique to an account, and ensures a final layer of oversight in securely adding users. If they match, select Submit.

Exemple de phrase d'empreinte


note
Si Ne jamais demander de vérifier les phrases d'empreinte a été activé, la vérification de la phrase d'empreinte peut être réactivée en effaçant le cache et les cookies du navigateur.