User Seats
note
Dieses Dokument behandelt den manuellen Onboarding-Prozess für das Hinzufügen von Benutzern zu Bitwarden Organisationen, jedoch bietet Bitwarden zwei Methoden für die automatische Bereitstellung von Benutzern und Gruppen:
Enterprise-Organisationen können SCIM-Integrationen für Azure AD, Okta, OneLogin und JumpCloud nutzen.
Teams und Enterprise Organisationen können den Directory Connector für Active Directory/LDAP, Azure AD, Google Workspace, Okta und OneLogin verwenden.
The Bitwarden web app can be used to add members to your organization. To ensure the security of your organization and secure sharing of data, adding new members is 3-step process designed to maintain end-to-end encryption:
Invite: Admins issue emails to users, inviting them to join the organization.
Accept: Users interact with email invitations in order to begin joining the organization.
Confirm: Admins confirm that the accepted users are authorized to join the organization.
tip
Für Enterprise-Organisationen empfehlen wir, Enterprise-Richtlinien zu konfigurieren, bevor Sie Benutzer einladen, um die Einhaltung beim Betreten Ihrer Organisation zu gewährleisten.
To invite users to your organization:
Log in to the Bitwarden web app and open the Admin Console.
Navigate to the Members view and select the Invite member button:
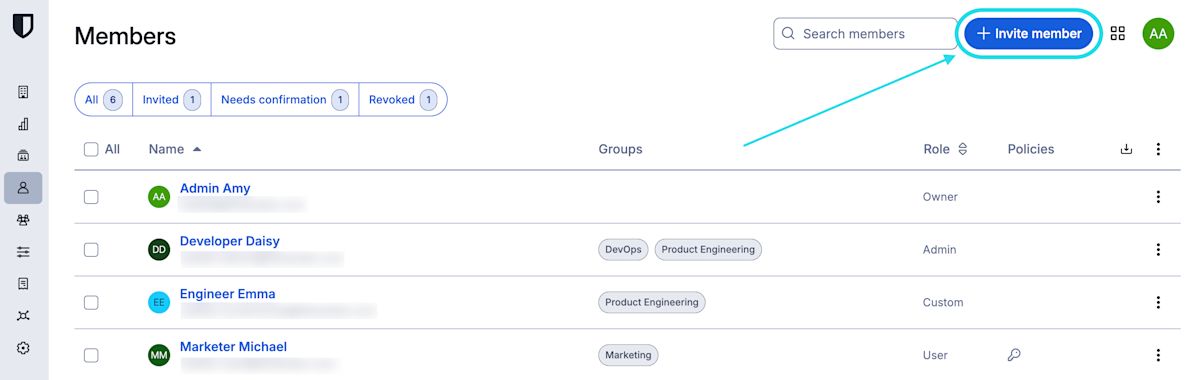
Benutzer einladen On the Invite member panel:
Enter the Email addresses where new members should receive invites. Add multiple members at one time by comma-separating email addresses.
Select the Member role to be applied to the new members. Member role will determine what permissions they will have at an organizational level.
In the Groups tab, select which groups to add these users to.
In the Collections tab, select collections to give these users access and what permissions they should have for each collection.
note
Während die Mitgliederrolle nur auf der Ebene des einzelnen Mitglieds festgelegt werden kann, können die Berechtigungen entweder für ein einzelnes Mitglied oder für eine Gruppe als Ganzes festgelegt werden. Auf Mitgliedsebene festgelegte Berechtigungen haben Vorrang vor den auf Gruppenebene festgelegten Berechtigungen.
Click Save to invite the designated members to your organization.

note
Einladungen laufen nach 5 Tagen ab . Zu diesem Zeitpunkt muss der Benutzer erneut eingeladen werden. Laden Sie Benutzer erneut in großen Mengen ein, indem Sie jeden Benutzer auswählen und das Optionen Menü verwenden, um Einladungen erneut zu senden:

Wenn Sie Bitwarden selbst hosten, können Sie die Ablaufzeit für Einladungen mit einer Umgebungsvariable konfigurieren.
Invited members will receive an email from Bitwarden inviting them to join the organization. Clicking the link in the email will open the Bitwarden web app, where the user can log in or create an account to accept the invitation:

Users must fully log in to the Bitwarden web app to accept the invitation. When an invitation is accepted, users will be notified that they can access the organization once confirmed. Organization members will have their email automatically verified when they accept an invitation.
To confirm that the accepted users are authorized to join the organization:
In the Admin Console, navigate to the Members view.
Select any members marked
Needs confirmationand use the options menu to Confirm selected: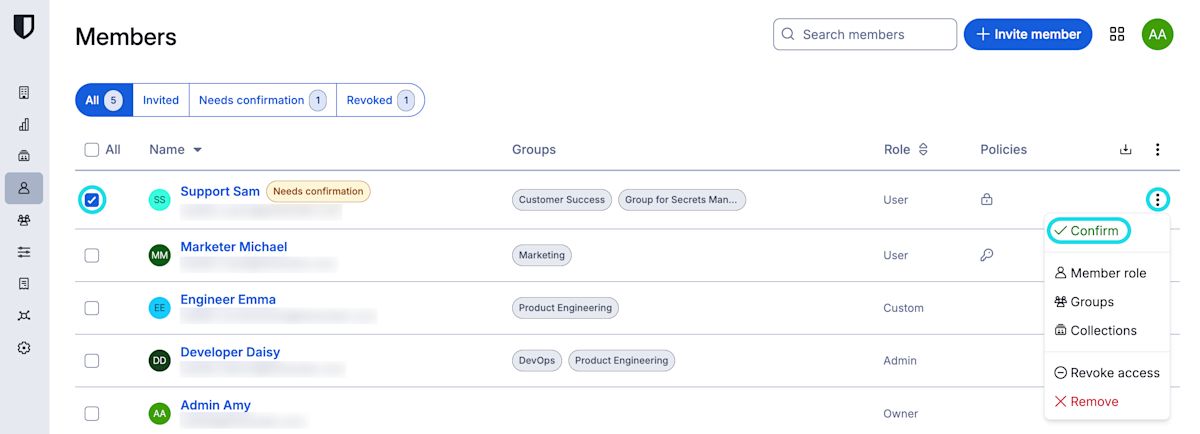
Benutzer bestätigen Using a secure means of communication, validate with each new member that the fingerprint phrase displayed to you at this stage matches what they can find in their in Settings → My account view. Each fingerprint phrase is unique to an account, and ensures a final layer of oversight in securely adding users. If they match, select Submit.

Beispiel für einen Prüfschlüssel


note
Wenn Nie auffordern, Fingerabdruck-Phrasen zu überprüfen aktiviert wurde, kann die Überprüfung der Fingerabdruck-Phrase durch Löschen des Browser-Cache und der Cookies wieder aktiviert werden.